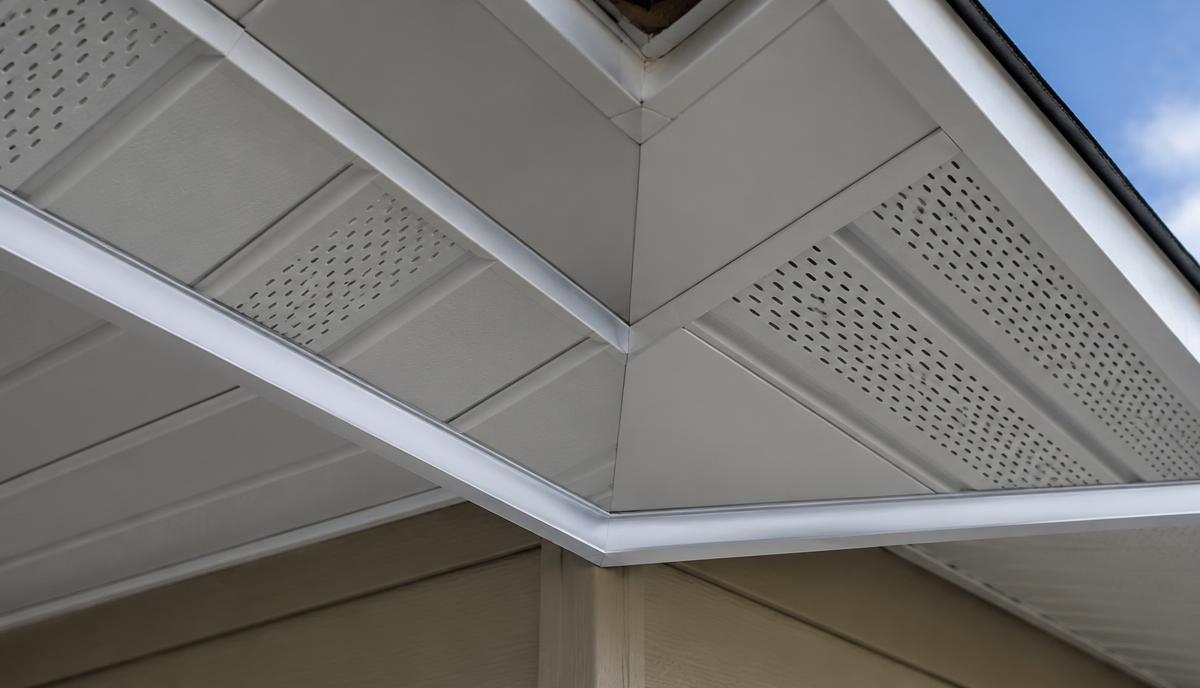
Plan a clean Nanoleaf roofline installation with Deliciosa Decor channel, sound fastening, tidy corner returns, and accessible wiring. Learn what to check before drilling and what to include in installer quotes.
A 90-degree soffit return can make a Nanoleaf permanent outdoor lights install look tidy or patched together. Before drilling, hold a channel sample against both sides of the corner and check the light spacing from the driveway.
The straight sections are usually simple. Corners, changes in roof pitch, and the move from soffit to fascia need more planning because small errors show across a long roofline.
Plan Your Nanoleaf permanent outdoor lights install
Measure each straight section separately, including the gable and short returns. Mark outlets, downspouts, vents, and places where someone can safely reach a connector later.
Then test several lights after dark at different distances from the wall. A small setback change can alter the light pattern, especially over brick or uneven siding.
- Record the exact Nanoleaf model and its approved extensions.
- Check maximum low-voltage run length and power-supply limits.
- Identify solid backing behind soffit panels and fascia trim.
- Plan accessible power, controller, and connector locations.
A clean Nanoleaf permanent outdoor lights install starts with these checks, not a box of fasteners. Use the visualizer to see it on your own home and get matched with installers, then confirm dimensions on site.
Check Deliciosa Decor Channel Compatibility
Deliciosa Decor is LightPro Connect’s affiliated hardware partner for mounting tracks and channels. However, don't assume every channel fits every Nanoleaf light body or connector.
Before ordering mounting hardware for your roofline, verify the current channel dimensions, retention method, and access for replacement. Ask for a sample if the fit is unclear.
Match the Hardware to the Actual Light
Check lens clearance, cable exit direction, and room behind the light. A channel must hold the fixture without pinching insulation or hiding part of the lens.
Treat 8mm mounting holes and 2.5 inch fastener spacing as specifications to verify, not universal instructions. If those dimensions appear on your selected hardware, confirm their purpose and follow its fastening guidance for your substrate.
Soffit Versus Fascia Mounting
For a Nanoleaf permanent outdoor lights install, the mounting surface affects both appearance and service access. Choose the light direction first, then decide how to conceal the cable.
| Location | Advantage | Trade-off |
|---|
| Soffit underside | Hides hardware from many street views and directs light downward. | Thin panels may need backing; vents must remain open. |
| Fascia board | Can provide a straight mounting line and sound fastening surface. | Hardware is more visible; gutter brackets may interrupt the route. |
| Gable roofline | Continues the outline up the roof pitch. | Needs planned angle changes and safer high-access equipment. |
Don't fasten only into loose aluminum wrap or vinyl. Also, keep screws clear of roofing, the drip edge, and concealed wiring; don't use channel to bridge rotten wood.
Mount the Straight Runs Before Closing Corners
Dry-fit the complete Nanoleaf permanent outdoor lights install before final fastening. That exposes awkward light spacing while pieces can still move.
- Set a reference line. Measure from the wall or fascia, then check the line from the ground.
- Locate backing. Select exterior-rated fasteners compatible with the channel and underlying material.
- Cut and deburr. Remove sharp edges and chips before feeding any cable.
- Fit the channel loosely. Follow its instructions for slots, joint gaps, and thermal movement.
- Install and test lights. Check retention, connectors, and scenes before closing accessible covers.
Installer tip: sight along the channel after the first two fasteners. Tightening one screw against a wavy fascia can twist the whole section, so correct the backing instead of forcing it flat.
In addition, keep a short offcut as a setback gauge. It's easier to use one-handed on a ladder than repeatedly reading a tape, but check alignment from the ground too.
Make Corner Returns and Transitions Serviceable
Outside Corners and Soffit Returns
At a soffit return, dry-fit both channel ends before cutting a miter. A square-ended joint with suitable end caps may be cleaner than a tight miter on an out-of-square house.
Keep the last light on each side visually balanced. However, never cut a factory light string just to improve spacing unless that exact model explicitly permits it.
Inside Corners and Gable Changes
Inside corners need room for the cable’s permitted bend radius. Don't trap a connector behind a permanent joint or pull the wire tight around a sharp channel edge.
At a gable transition, mark the actual roof pitch with a bevel gauge rather than guessing. Leave a supported service loop where allowed, so a connector can be inspected without removing a whole run.
Moving From Soffit to Fascia
Use a protected cable route between surfaces, with edge protection where cable passes through metal. Existing J-channel is siding trim, not automatically an approved cable raceway.
A serviceable Nanoleaf permanent outdoor lights install leaves drainage paths open. Don't caulk every joint shut or conceal connectors where water collects.
Power, Weather, and Final Testing
Check the rating of each component separately. IP65 does not mean submersible, and it doesn't establish that every power supply or connection can sit exposed outdoors.
Use the specified outdoor power arrangement and required GFCI protection. Have a qualified electrician handle new line-voltage work; review the CPSC’s GFCI guidance and OSHA’s ladder safety guidance before work begins.
Test your Nanoleaf permanent outdoor lights install with static colors, brightness changes, and scheduled scenes. Meanwhile, confirm Wi-Fi coverage and app access before the crew removes its access equipment.
Frequently Asked Questions
How Much Does Installation Cost, and How Long Does It Take?
A professionally completed Nanoleaf permanent outdoor lights install typically falls in a broad range from the low thousands to several thousand dollars. Height, footage, channel, repairs, and electrical work affect the total. A straightforward accessible roofline may take a day; complex returns or lift access can add days. Ask for an itemized site-specific estimate.
Will Mounting Channel Affect My Warranty?
Check the current Nanoleaf warranty and installation instructions before approving third-party mounting hardware. Don't assume channel installation is automatically covered or excluded. Ask the installer to separate the lighting warranty, hardware warranty, and workmanship coverage in writing. Also, confirm who pays for access equipment if a light later needs replacement.
How Long Can the Run Be, and Can I Use App Scenes Year-Round?
The permitted run length depends on your exact kit, power supply, and approved extensions. Added jumpers may count toward limits, so don't rely on another model’s specification. App-driven scenes support year-round use, but confirm your model’s scheduling and control features. Have the installer demonstrate account ownership, grouping, and recovery after a power interruption.
How Do I Find a Qualified Installer Near Me?
For a Nanoleaf permanent outdoor lights install near me, compare roofline experience and written scope rather than distance alone. LightPro Connect is a nationwide, manufacturer-neutral marketplace with vetted installers covering Govee, Lumary, Eufy, Nanoleaf, Philips Hue Festavia, and Enbrighten Eternity. Review supported lighting brands and confirm local availability in metros such as Dallas, Atlanta, or Phoenix.
LightPro Connect isn't owned by or affiliated with a lighting manufacturer. Request quotes to compare multiple local installer offers through one request, and ask each installer to include channel, corner details, and service access.