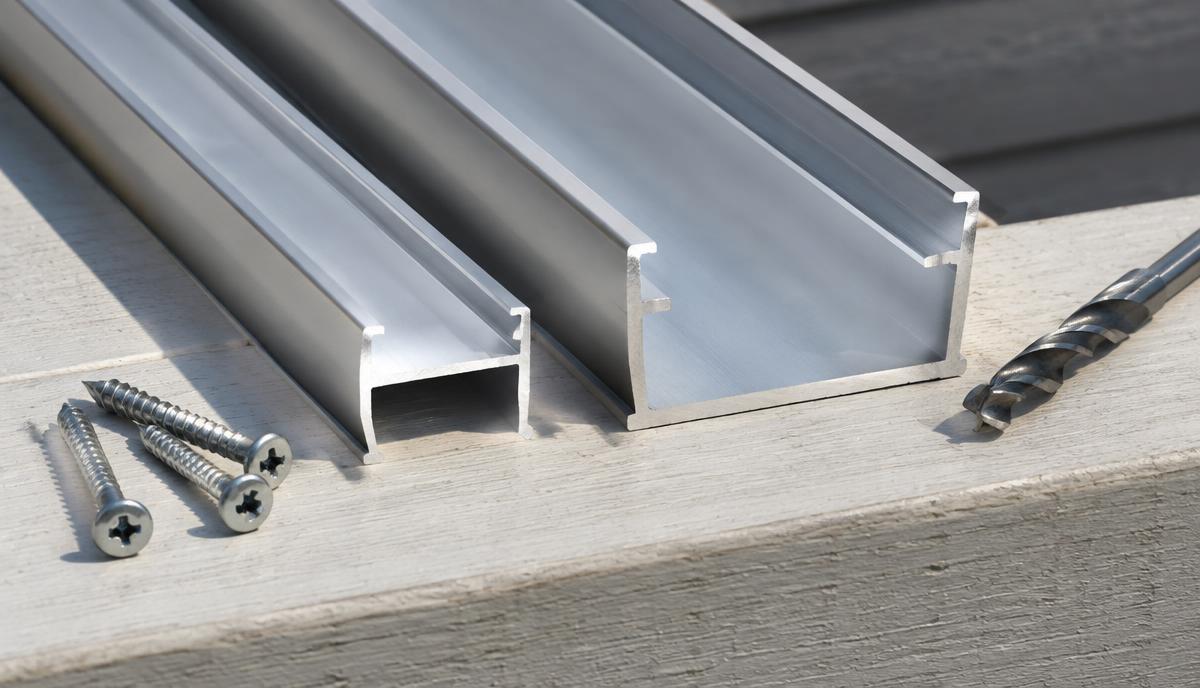
Pro and non-Pro Govee kits need model-matched mounting hardware. Here’s how to check bulb pitch, channel clearance and cable routing before ordering Deliciosa Decor tracks.
Before fastening the first 10 feet of Govee permanent outdoor lights mounts, test a light puck and its cable in a sample track. A channel can look right from the driveway yet pinch the wire or leave the puck loose. That mismatch gets expensive once the lift is on site.
For Deliciosa Decor hardware, match the track to the exact Govee kit, not just the brand. LightPro Connect’s affiliated hardware partner supplies mounting tracks and channels, but current product drawings should settle dimensions and compatibility before you order.
Govee permanent outdoor lights mounts: match the kit
Start with the model number on the controller, carton or purchase record. “Non-Pro” isn't a precise hardware specification, especially if a customer has mixed leftover strings with a newer kit. Record each string’s model before laying out the roofline.
Pro and non-Pro tracks should not be treated as interchangeable. Puck shape, cable clearance and mounting details can differ. However, without the current Deliciosa Decor drawings for both tracks, a fixed width or spacing claim would be a guess.
What to send with the hardware request
- The full Govee model number and kit length.
- A face and side photo of a puck beside a ruler.
- Measured center-to-center bulb spacing across several intervals.
- Photos of connectors, cable exits and the proposed mounting surface.
- A roofline sketch showing corners, gables and power locations.
Use the installer hardware resources to start the Deliciosa Decor fit check. Ask for written confirmation of the compatible track SKU, its usable dimensions and the matching accessories.
Compare bulb spacing before laying out tracks
Bulb spacing is the pitch between neighboring light centers, not the exposed wire length. Lay the string straight without pulling it tight. Measure from the first puck center to the sixth, then divide by five to reduce measuring error.
Govee permanent outdoor lights mounts must accommodate that pitch without stretching the cable. For pre-cut openings, the opening pitch needs to match the string. For adjustable mounts or continuous channels, confirm how each puck is located and retained.
Pro versus non-Pro: the practical comparison
- Bulb spacing: Measure the Pro string and non-Pro string separately. Don't transfer one kit’s layout marks to the other.
- Channel width: Check each puck’s widest point and cable exits against its model-matched channel. Outside track width alone doesn't prove fit.
- Wire management: Confirm room for the actual cable, bends and retainers in each system. Connector clearance needs a separate check.
- Ordering: Request the Pro-compatible SKU for a verified Pro model, or the specifically listed non-Pro SKU for that model. Avoid a purchase order labeled only “Govee track.”
At a gable peak, center the layout before fastening both slopes. Otherwise, a small pitch error can leave one puck crowded against the peak while the opposite side has a large gap.
Channel width: check the inside, not the label
A useful comparison of Govee permanent outdoor lights mounts includes usable internal width, depth and opening size. A wider channel may hide more cable, but it can also look bulky against a narrow soffit return. A slimmer track needs closer attention to cable routing.
Dry-fit the entire assembly
Seat a puck, route its wire, and install any cover or retainer on a short sample. The parts should close without forcing the cable flat. Then check that the light faces squarely toward its intended throw.
Ask separately about connector pockets and end caps. A channel that accepts the cable may not accept a connector, so plan an accessible transition rather than forcing that joint behind trim.
If a drawing shows 8mm mounting holes or 2.5 inch fastener spacing, confirm what those dimensions describe. They are not universal Govee or Deliciosa Decor specifications, and a clearance-hole diameter doesn't determine the correct screw size.
Wire management at corners and transitions
Good Govee permanent outdoor lights mounts support the lights while keeping wires out of pinch points. Leave a small service loop where the manufacturer permits it, especially near an accessible connection. However, don't pack a tight coil into a shallow channel.
Pro and non-Pro kits may have different rules for cutting, splicing and extensions. Follow the exact kit manual for low-voltage run length and approved connections. A track cannot make an unsupported splice acceptable.
- Mark feed points, corners and approved extension locations before cutting track.
- Deburr cut channel ends so they cannot abrade the cable.
- Keep connectors accessible without removing a whole roofline run.
- Route outdoor connections according to the kit’s moisture-protection instructions.
- Test every section before closing covers or leaving the ladder.
On the ladder, run a fingertip along each cut edge before loading wire. Also, loosely start adjacent track sections before tightening them; that lets you align the joint without leaving a lip that catches a cover.
Mount to sound material and protect the roofline
Choose Govee permanent outdoor lights mounts around the actual soffit, fascia board and roofline conditions. Don't rely on thin vinyl or aluminum trim alone to hold screws. Find suitable backing and use fasteners appropriate for the substrate and hardware instructions.
Keep the drip edge clear and preserve soffit ventilation. J-channel is siding trim, not automatic structural backing. Meanwhile, check behind a soffit return before driving screws where cables or other services might pass.
An IP65 marking applies to the component carrying that rating, not every field-made connection. Use the power arrangement specified by the manufacturer, including GFCI protection where required. Review the CPSC guidance on GFCIs and the Department of Energy’s LED lighting guidance for broader safety and energy context.
What installers should order
A complete order for Govee permanent outdoor lights mounts needs more than total roofline footage. Price the measured layout, access needs and model-specific hardware together. Waste allowance should reflect actual cuts, not an unexplained percentage.
- Track: Confirmed model-compatible SKU, finish, section length and quantity.
- Accessories: Required retainers, covers, ends and supported corner details.
- Fasteners: Substrate-matched screws and any specified washers.
- Electrical parts: Only approved extensions and connection accessories.
- Service stock: A practical allowance for damaged pieces and future access.
For homeowners, compare the mounting method as well as the lights. Preview the look with the outdoor lighting visualizer, then discuss year-round app-driven scenes with the installer. Hardware fit comes first; scene settings come after testing.
Get quotes for a model-matched installation
LightPro Connect is a nationwide, manufacturer-neutral marketplace connecting homeowners and businesses with professional installers. Request permanent outdoor lighting quotes with your model number and roofline photos so installers can scope compatible tracks, access and wiring before the job.